With the new year here, we want to share a story that is near and dear to our hearts, called Patchwork Stories. Here at AGF, we want to cover our world with beautiful fabrics and go back to what is most meaningful- creating things from our hands. This movement of patchwork is becoming more influential than ever, and it’s being represented not just in fashion but in all the things that surround us.
This is the story of how we incorporate patchwork and the role it can play in your everyday life! This series shows you more than pretty fabrics, but a lifestyle that we live by in which we are so thrilled to finally tell it. Through the course of a couple of months, we gathered some of our favorite patchwork projects that include apparel, home decor, accessories, and much more to tell our story, and to show you a variety of ways you can incorporate this lifestyle yourself!
Welcome to the first week of #AGFPatchworkStories, where we show you our first pride and joy, these eye-catching quilt coats on Instagram! We used Megan Nielsen Patterns – Hovea quilted jacket pattern for all three coats, all of them featuring some of our favorite patchwork techniques like reverse applique, bargello technique, and 45-degree strip piecing that we are showing you today.
Check out the making, tips and tricks, and what we created for one of our quilt coats!
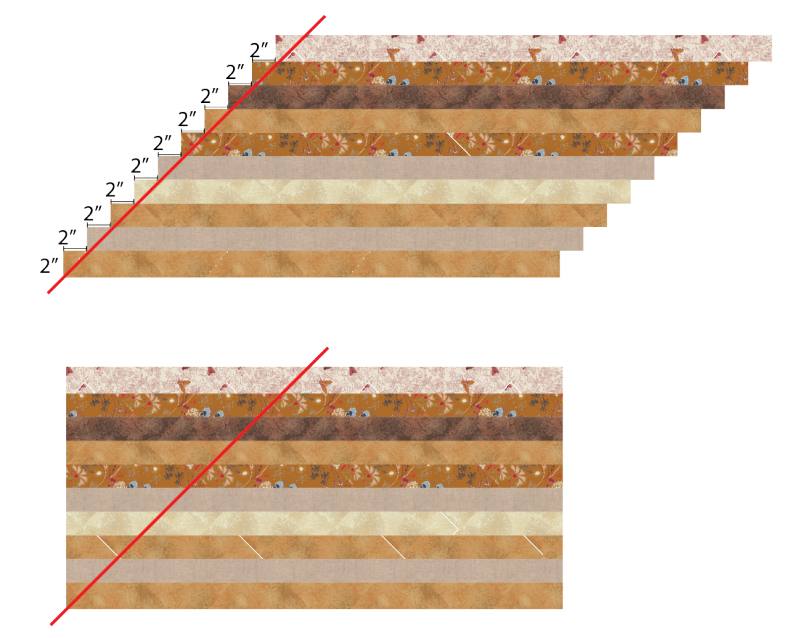
Start by joining each 2½” x WOF strips from assorted fabrics 2” in from the previous strip. If you were to use 3½ strips, then you join each strip 3” in from the previous strip.
We join the strips this way to save fabric. If we were to join the strips matching edges we will waste a good amount of the block and we will not be able to have as many strips as we want. See the example below.
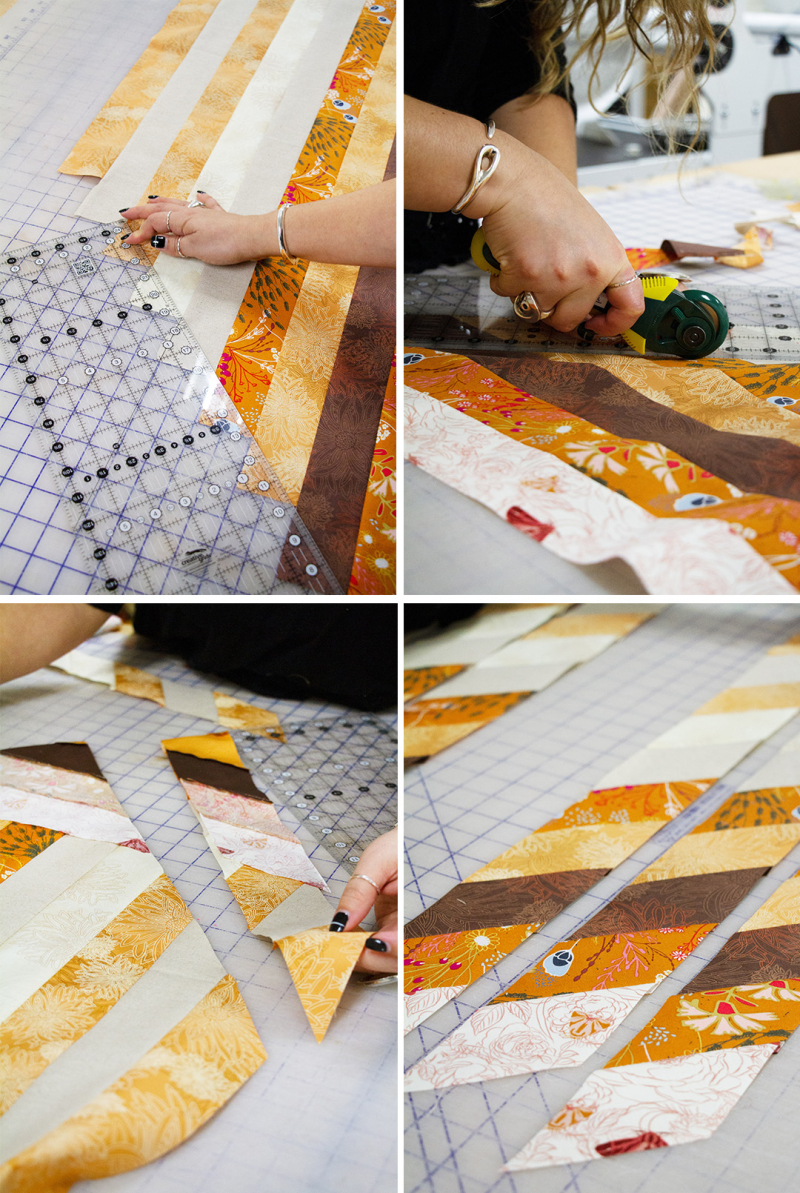
Align your ruler at 45˚ to the top or bottom of your block and start cutting 2½” diagonal strips. The quilter’s ruler has different lines that show you different angles, look for the 45° line and align it as shown on the diagram below, and start cutting as many strips as you need.
To sew each diamond strip, don’t line your rows up so that the seams match right at the edges that you are getting ready to sew. Instead, the seams should match ¼” in from the edge. That way, when you sew ¼” from the edge, the matching points aren’t lost in the seam allowance, but are instead right where you want them, making nice, crisp matching corners to make your diamonds.
We hope you enjoyed the first week of this series and we can’t wait to show you something new every week! Make sure to follow us on social media to stay up to date and we’d love for you all to join us in this movement. Show us how you incorporate patchwork into your daily lives by using the hashtag #AGFPatchworkStories!
Until next time,
-Jannelle


Leave a comment