Welcome back!
Summer season is upon us and I'm sure everyone is excited to get started on their summer sewing list! The season is calling for fun and bright projects, and today we have something very exciting for you. If you are into quilting, you definitely have heard of Flying Geese, it's a lovely block unit that you see often in quilts and tons of patchwork projects alike! There are so many ways to create them, but here at AGF, we've discovered a whole new look.
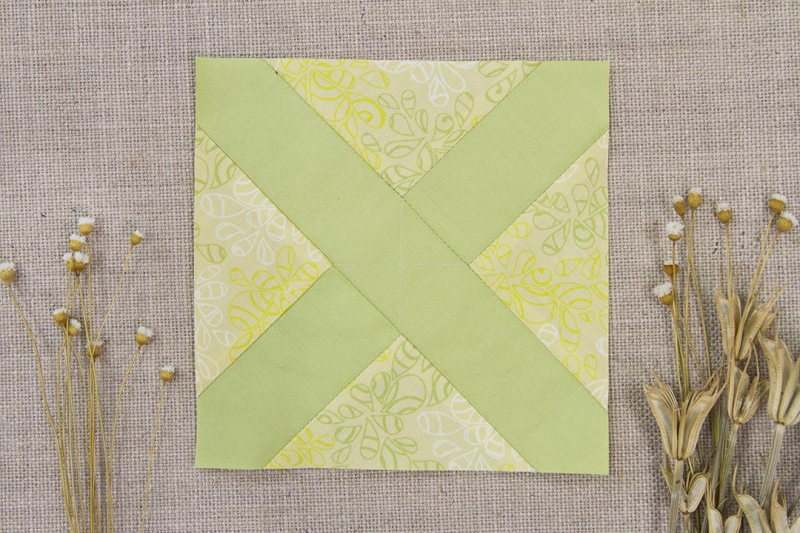
We like to call it the Stroked Flying Geese, a technique similar to the No Waste Flying Geese but with a twist! It's almost like every little triangle in the center is bordered, creating this awesome effect at the end.
Follow along with me as I show you a step-by-step picture tutorial on how to create the Stroked Flying Geese with summery colors from our Nature Elements and Pure Solids.
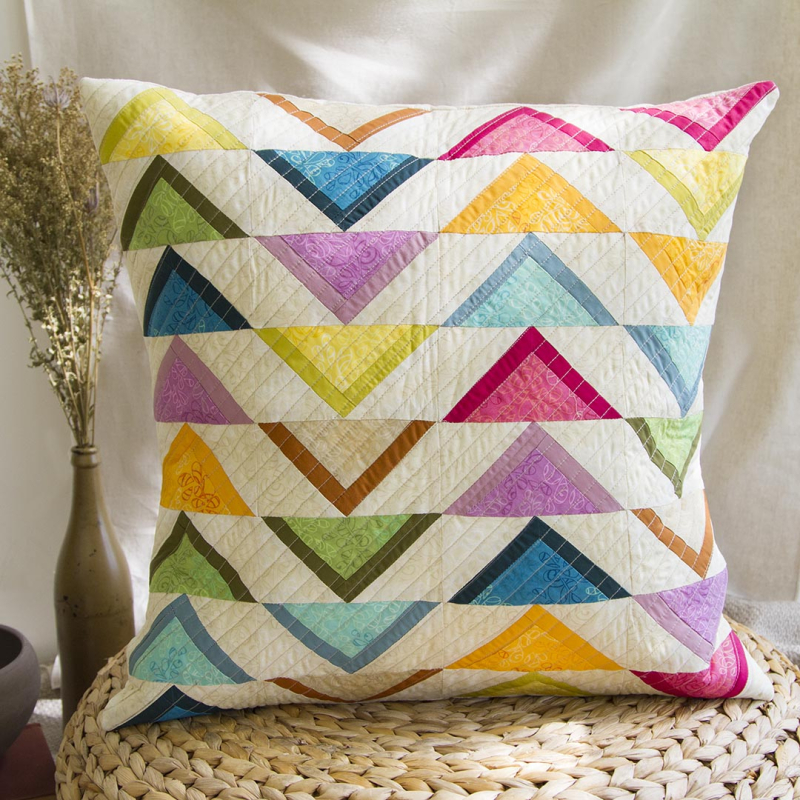
Also, stay tuned till the very end to see a 20’’ x 20’’ pillow cover I made using this tutorial, that you can download and recreate too!
Let's get started!
First, you will need four (4) 4 1/2” squares from our Nature Element NE-105 in "Mimosa", two (2) 4 1/2” x 2” strips from our Pure Solids PE-515 in "Olive Oil" and one (1) 10“ x 2” strip, and four (4) 3 3/8” squares from Nature Element NE-104 in "Natural".
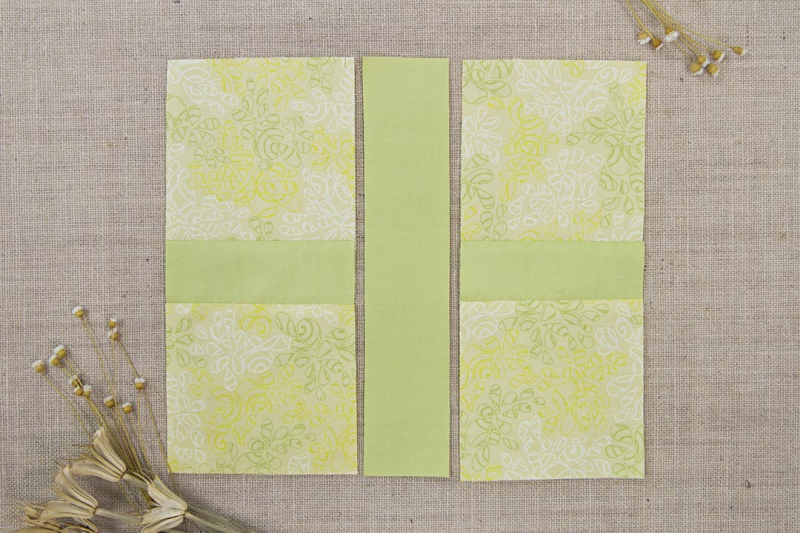
Now, take four (4) 4 1/2” squares from NE-105, two (2) 4 1/2” x 2” strips from PE-515, and join them into two fabric strips.
Take one (1) 10” x 2” strip from PE-515 and join it in the center of the two strips.
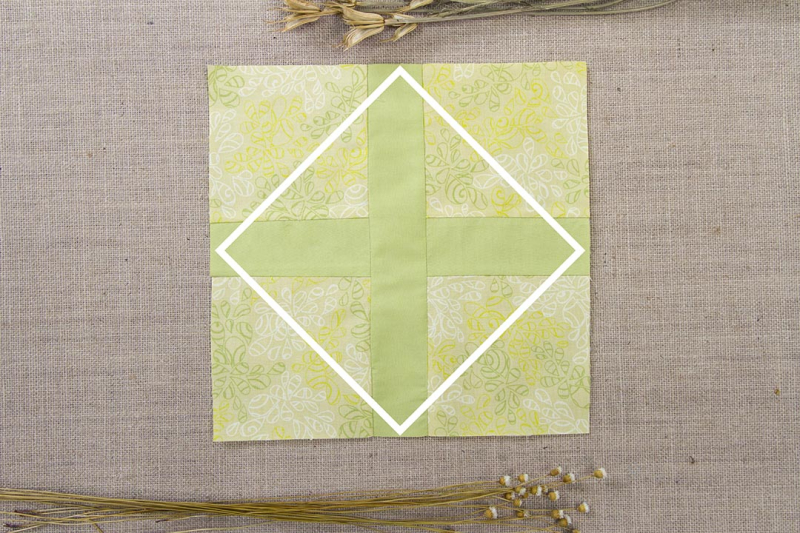
Make a template of a 6 1/4” square, then place it on point on top of the block making sure it is perfectly centered, align it with the center strips of the block, and trim.
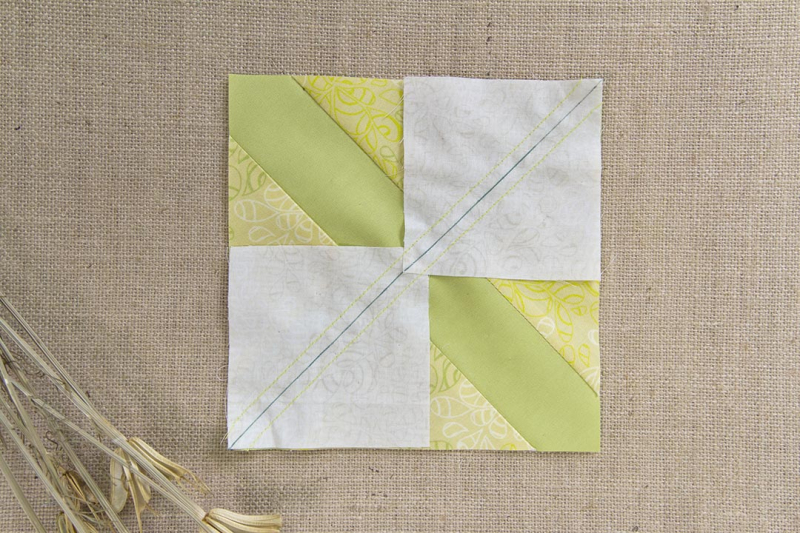
Take two (2) 3 3/8” x 3 3/8” squares from NE-104 and place them on the diagonal aligned to the corners.
Pin them in place, and draw a line from point to point.
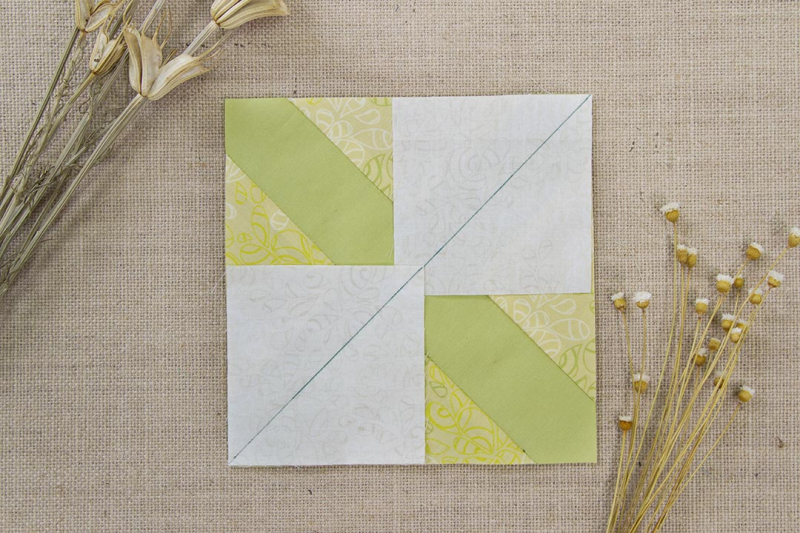
Stitch at 1/4” from the drawn line on each side. Cut on the drawn line.
Take two (2) 3 3/8” x 3 3/8” squares from NE-104 and place them on the diagonal aligned to the corner NE-105.
Pin them in place, and draw a line on the diagonal of NE-104.
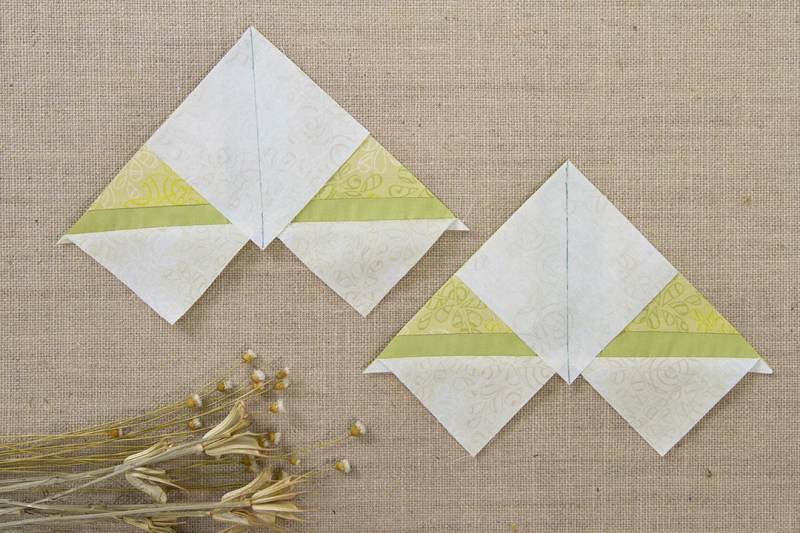
Stitch at 1/4” from the drawn line on each side. Cut on the drawn line.
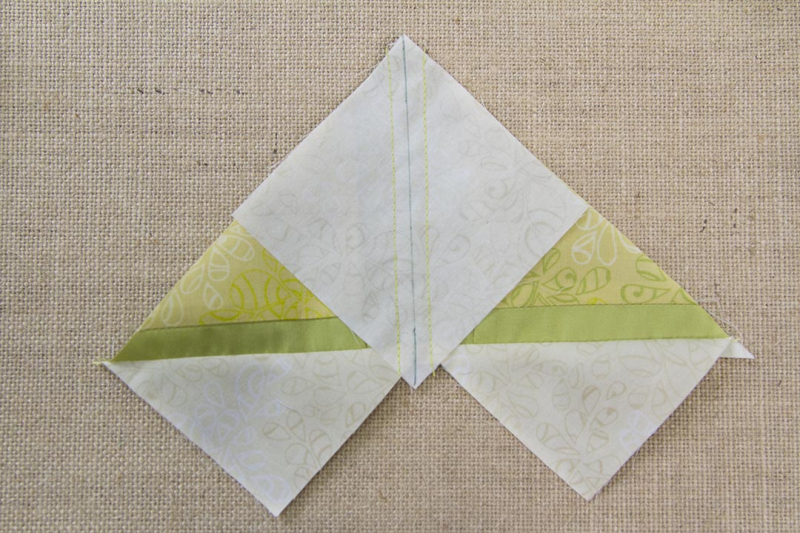
Open and press. You will end up with two stroked flying geese.

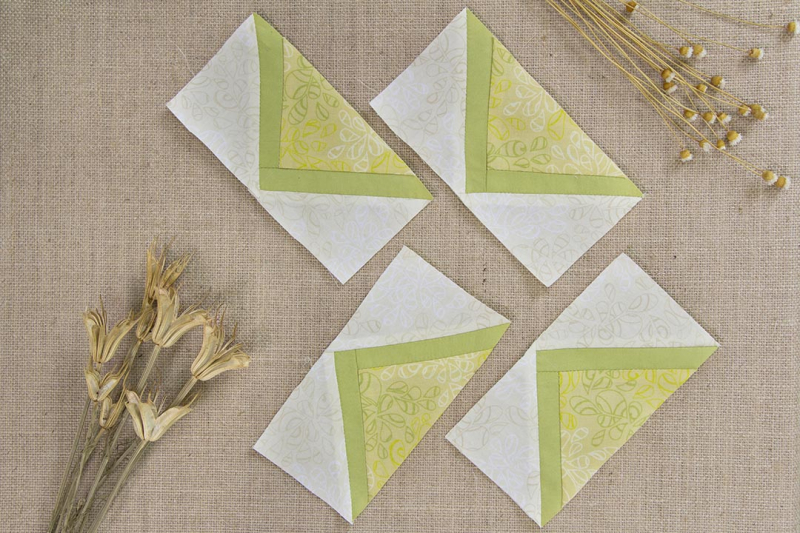
Repeat the same process for the other piece. Trim all four pieces.
Tada! Now you have four stroked flying geese!
At last, we arrived at the end and I'd like to introduce to you this beauty I like to call "Summer Pillow" that uses this same technique to achieve. CLICK HERE, to download the instructions and view all the pretty fabrics we used for it.
This pattern is also a great way to practice this technique that you can later apply the next time you create a patchwork project. I'm sure all your quilting friends are going to enjoy adding this special twist, so make sure if you use it, to tag us on social media using the hashtag #artgalleryfabrics! We would love to see what you made.
As always, please let me know in the comments below if you have any questions!
Try this new technique, and have fun with this project!
-Jannelle






Leave a comment