Hello, my fellow makers,
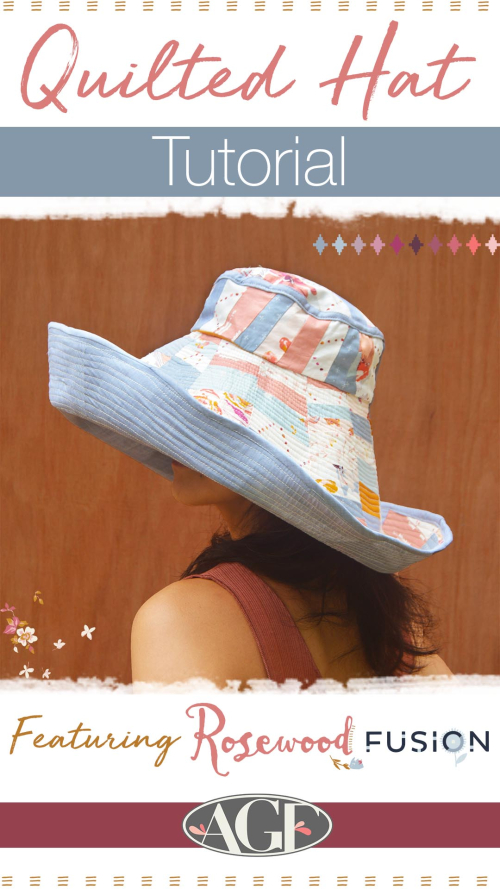
Today I want to take you on my journey of making a quilted hat. Like most of my design stories, it started with scrolling over Pinterest and Instagram. For some reason, I was always drawn to the images of summery and beautiful hats with big brims. When the soft and feminine Rosewood collection came out, I decided to look for a bucket hat tutorial and jump into the adventure. I realized that I could just use my love for improv piecing and the Dresden technique to replace the small brim of the tutorial for a big and quilty one.
I drafted and tested the patterns for a medium hat crown, medium hat body, and Dresden which you can download here Download AGF Hat Tutorial Templates
If you would like to size up or down the crown and body, I suggest you go to the YouTube tutorial that I used: Sewing & Drafting a Bucket Hat.
I had in hand a bundle of fat quarters from the Rosewood collection, some scraps of Raw Gold (PE-485), and one yard of Infused Hydrangea denim (DEN-S-2004). For extra materials, I used fusible cotton batting and 3” stiff horsehair (a trim used to give volume to dresses and skirts and that you can find in any fabric store).
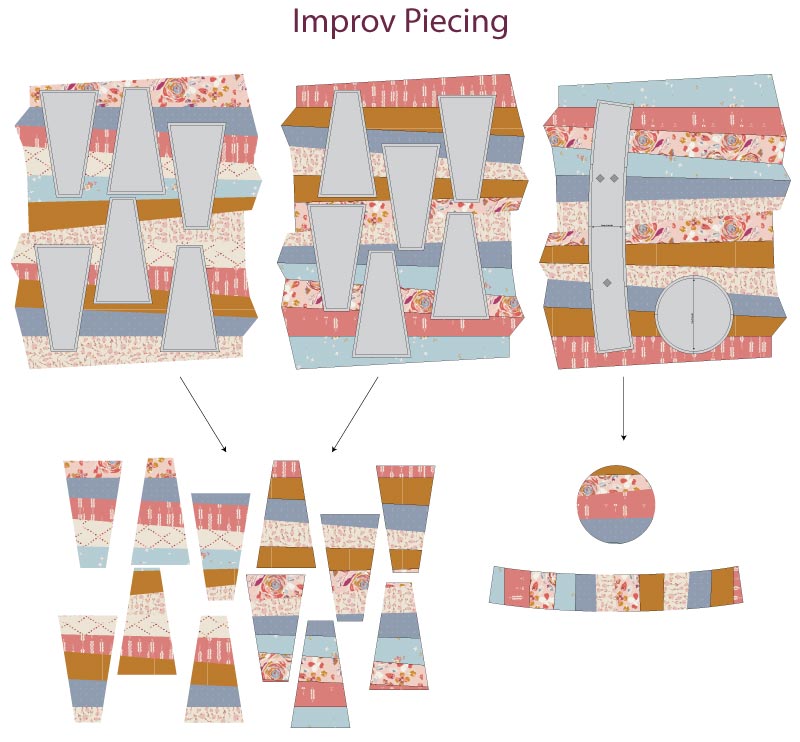
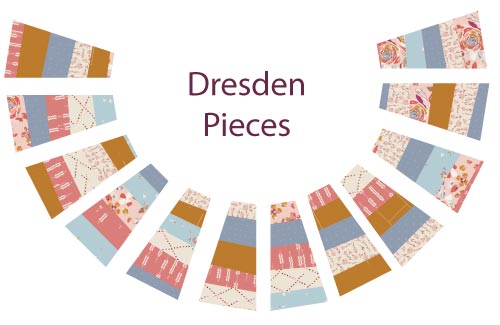
I started by cutting irregular strips of the fabrics I liked the most and then joined them randomly to have three improv-pieced bases. I placed my templates and cut them as follows: One (1) body, one (1) crown, and twelve (12) Dresden.
Hat Brim: I took my time to arrange the Dresden pieces before joining them. In the end, they looked randomly perfect and happy ;)
Once I had my hat brim ready, I traced it on the batting and the denim, and cut it. I also cut one (1) body and one (1) crown in denim for the lining.
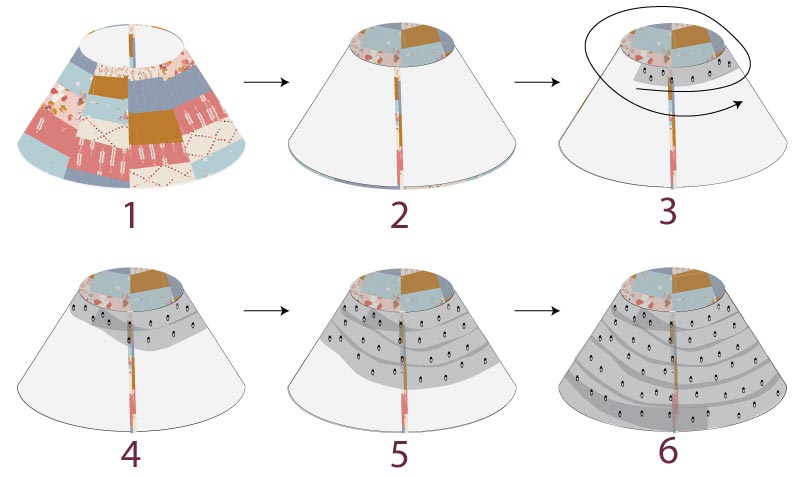
I layered the improv brim with the batting brim. Then I joined the edges of the two resulting pieces to get two lampshade like pieces.
- I took the improv-batting lampshade.
- Turned it inside out.
- Took the stiff horsehair and started attaching it from top to bottom and around using safety pins.
- 5. 6. Kept going until the whole hat was covered with horsehair.
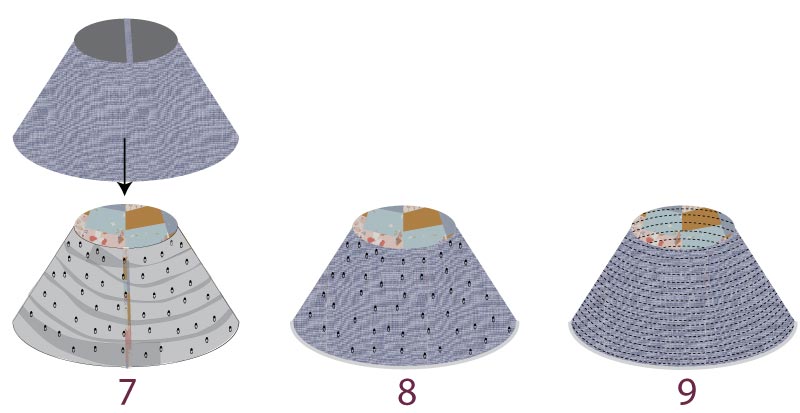
7. I took the denim lampshade right side out and placed it on top of the improv-batting one.
8. Carefully I repined everything together with safety pins, and removed the ones on step 7, making sure the fabric was as flat as possible.
9. This is the most challenging step: I sewed around the brim every 1/4" while removing the safety pins.
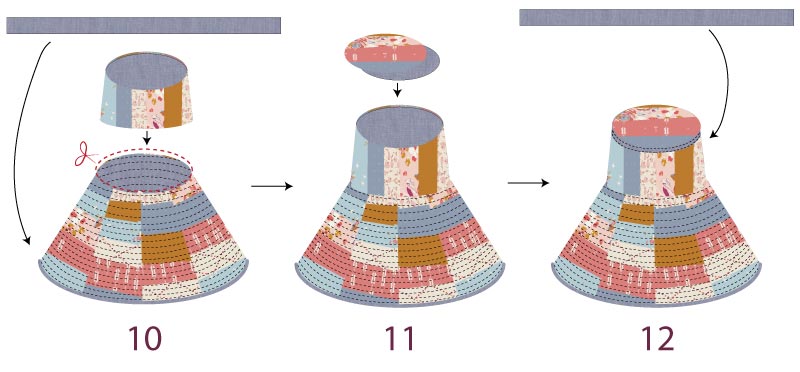
I took the improv pieced body and the denim body. I joined their ends to make two loops and inserted the denim body inside the improv pieced body wrong sides together.
10. I cut a 2" bias strip of denim and used it as binding to clean the big opening of the brim.
Ideally, the brim would match perfectly with the bottom edge of the body. Since I quilted it, it ended up smaller, so I had to trim a little bit of the top edge of the brim until the body and the brim matched.
11. I took the crowns and layered them wrong sides together, and joined them to the top edge of the body.
12. I took leftover denim bias tape and finished the raw edge of the crown. Finally, I topstitched the bias tape to give the hat a more casual look.
I hope you enjoyed my adventure! It took me a while and a few mistakes to find the way, and in the end, it was worth it. I love my hat and I take it on my morning walks when I don't want the sun in my face. My favorite part? I don't get hot wearing it because it is made of 100% AGF quilting cotton.
I hope you jump into the hat-making adventure too and share your story with me.
Happy hat making,
Laucara







Leave a comment