Hello Everyone!
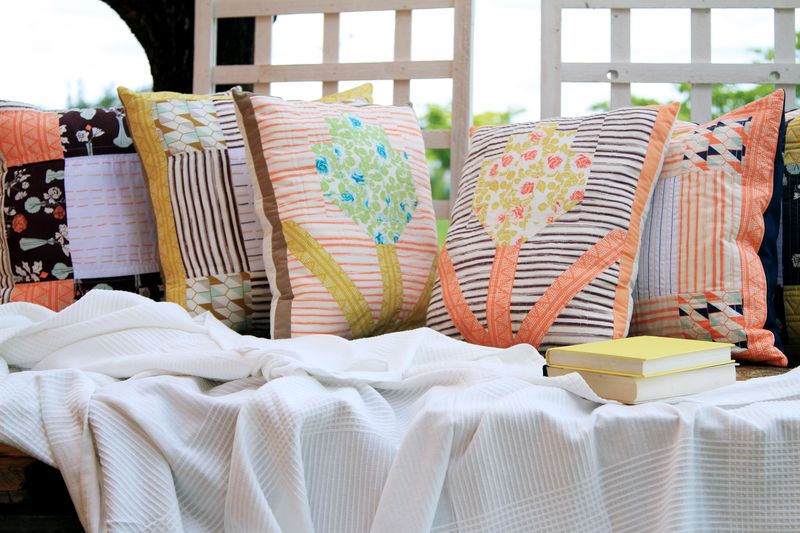
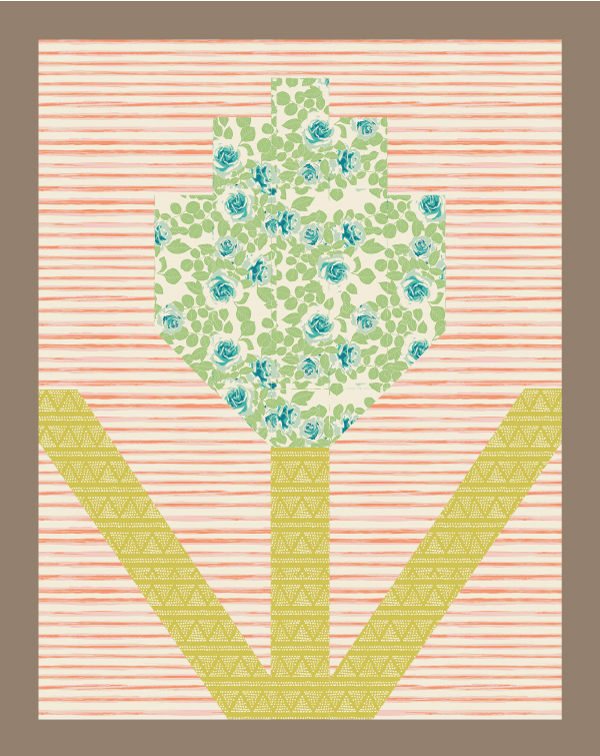
How have you all been doing? Today I would love to share with you a way to spruce up your home just by adding a few throw pillows. I designed a pillow called In Bloom featuring fabrics from Cultivate, a fabric collection designed by Bonnie Christine. This collection inspires you to get back to nature and to slow down and smell the roses! I have two different fabric options to choose from! Which one is your favorite? Here is what you will need to get started.
Fabric Requirements
Option #1
Fabric A- CUL-8678 – 1/8 yd.
Fabric B- CUL-9671- 1/8 yd.
Fabric C- CUL-9673- 1/3 yd.
Fabric D- PE-426 – 1/8 yd.
Fabric E- PE-436- 1/2 yd.
Option #2
Fabric A- CUL-9678 – 1/8 yd.
Fabric B- CUL-8671- 1/8 yd.
Fabric C- CUL-8673- 1/3 yd.
Fabric D- PE-445- 1/8 yd.
Fabric E- PE-436- 1/2 yd.
Cutting Directions
Two (2) 2” x 4“ strips from Fabric A
Two(2) 2” x 7 1/2“ strips from Fabric A
One (1) 2” x 8 1/2“ strip from Fabric A
One (3) 2”x 2” squares from Fabric A
Two (2) 2”x 16 1/2” strips from Fabric B
One (1) 2” x 7 1/2” strip from Fabric B
Two (2) 6 1/2” x 8 1/2” rectangles from Fabric C
Two (2) 3 1/2” x 9 1/2” rectangles from Fabric C
Two (2) 2“ x 4 1/2” strips from Fabric C
Two (2) 2“ x 2 1/2” strips from Fabric C
One (1) 2“ x 1 1/2” strip from Fabric C
Two (2) 1 7/8” x 1 7/8” squares from Fabric A and C
Two (2) 1 1/2” x WOF strips from Fabric D
Backing- Fabric E
Assembling the Pillow
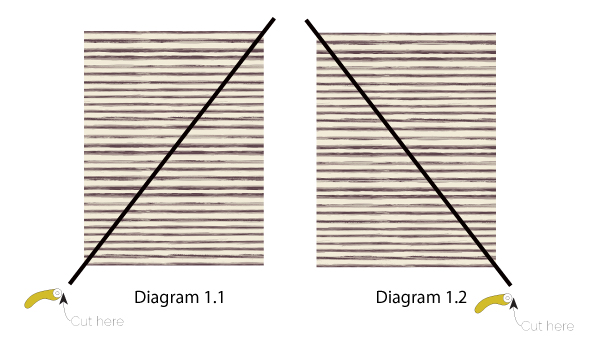
Take two 6 1/2” x 8 1/2” rectangles and cut from the left bottom corner diagonally to the right top corner.Cut the the other rectangle starting from the right bottom corner cutting diagonally to the top left corner. Follow Diagram 1.1 and 1.2.
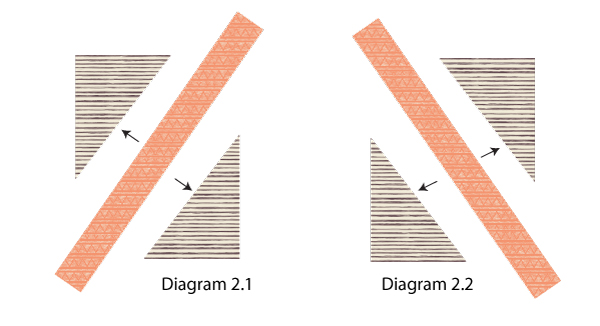
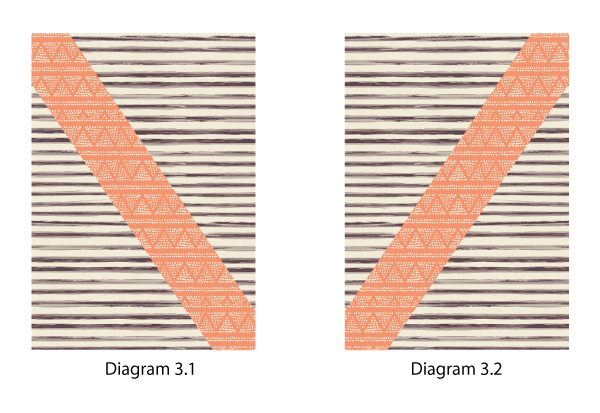
Next take both 2” x 16 1/2” strips from Fabric B. Lay your pieces out following Diagram 2.1 and 2.2. Fold all your pieces in half to mark the midpoint. Pin strip to the triangles made in Diagram 1, matching up the midpoint. Trim your piece to 9” tall and 6 1/2” wide. You should have to pieces that look like Diagram 3. 1 and 3.2
Take two 2” x 2” squares from Fabric A and draw a diagonal line from one corner to the other on the back side of the fabric. Place it right sides together to the right top corner of of the piece you made in Diagram 3.1. Sew on the diagonal line. Press piece and cut the seam allowance to 1/4”. Repeat same process with the other 2” x 2” square from Fabric A and the piece made in Diagram 3.2. This time place piece on the left top corner right sides together.
Sew a 2” x 7 1/2” strip from Fabric B to a 2” x 2” square from Fabric A. (Diagram 5.1) Next sew this piece in between both pieces created in Diagram 4.1-4.2. Follow Diagram 5.2
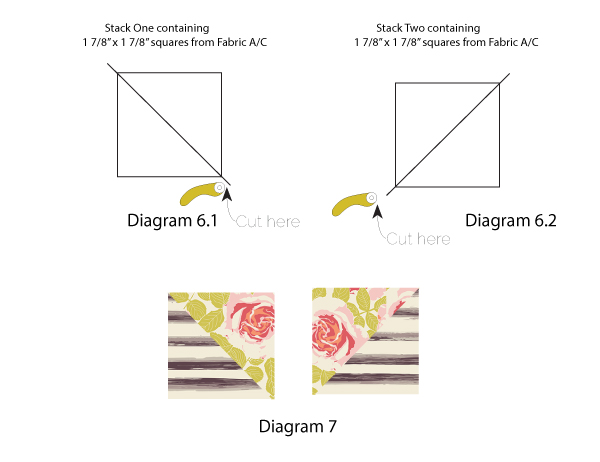
Now you will need to make two HST’s with Fabric A and C. Since Fabric C is a directional print and for this pillow the direction is horizontal, you need to make two stacks each with one 1 7/8” x 1 7/8” square from Fabric A and C on top of each other with right sides facing up. Cut one stack from the bottom right corner to the left top corner. Cut the other stack from the bottom left corner to the top right corner. (Diagram 6.1 and 6.2)
You need to have two HST’s that looks like Diagram 7.
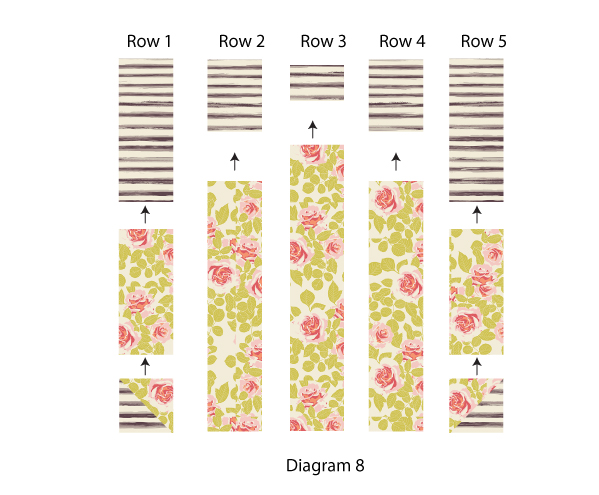
Sew the following rows:
Row 1: Sew a 2” x 4 1/2” strip from Fabric C to a 2” x 4” strip from Fabric A to a A/C HST.
Row 2: Sew a 2” x 2 1/2” strip from Fabric C to a 2” x 7 1/2” strip from Fabric A.
Row 3: Sew a 2“ x 1 1/2” rectangle from Fabric C to a 8 1/2” strip from Fabric A.
Row 4: Sew a 2“ x 2” x 4 1/2” strip from Fabric C to a 2” x 4” strip from Fabric A to a A/C HST.
Row 5: Sew a 2” x 2 1/2” strip from Fabric C to a 2” x 7 1/2” strip from Fabric A.
Sew row 1-5 together.
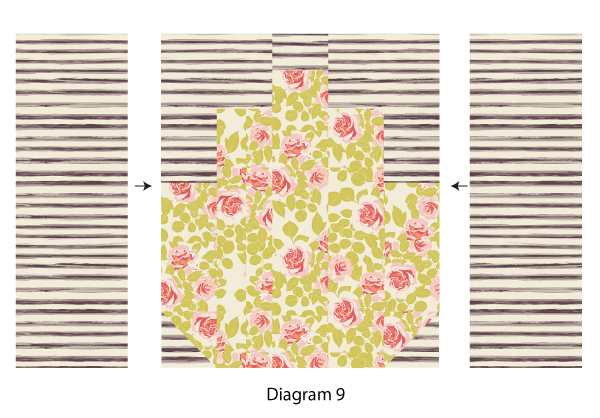
Now sew a 3 1/2” x 9 1/2” strip from Fabric C to each side of the piece created in Diagram 8.
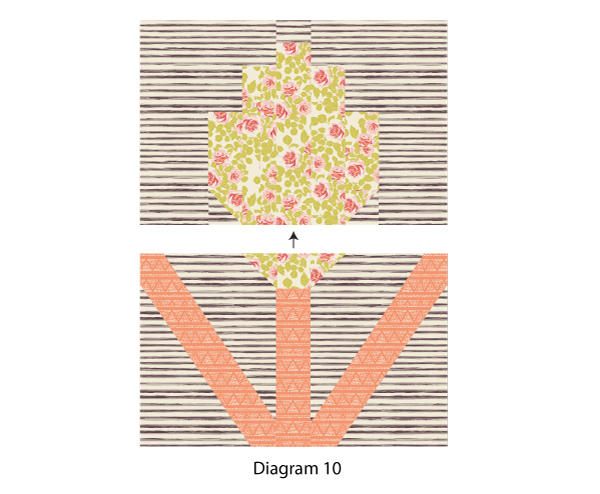
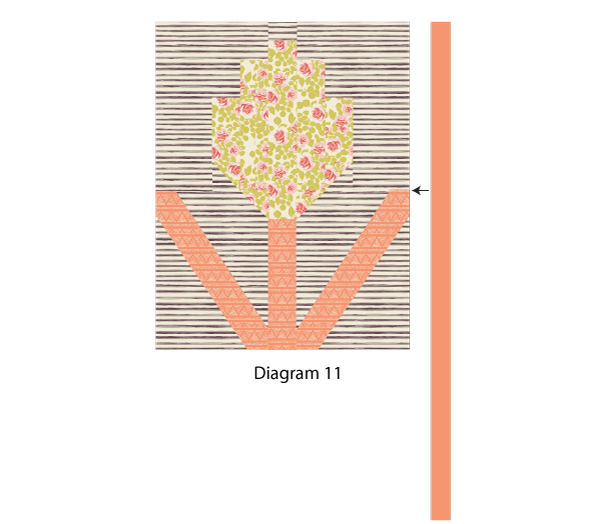
Sew the piece created in Diagram 8 to the piece created in Diagram 5.2.
To sew the border take a 1 1/2” x WOF strip and sew to one side of your pillow top. Cut off excess. Repeat this same step for the other side of your pillow top. Use the remaining pieces for the top and bottom of your pillow.
To create the back piece of your pillow use your pillow top as a template using Fabric E . At this point decide if you want your pillow to be quilted or not. If you decided to quilt it cut out a piece of batting a little bigger then your pillow top and quilt as desired.
Square off pillow top and sew back piece and your pillow top together with right sides together but leave a 4” unsewn portion so you can turn your pillow right side out, stuff your pillow with polyfil and hand sew pillow closed. You can also make a muslin pillow case and stuff polyfil into the case before stuffing it into your pillow to create a smooth less lumpy pillow!
Option #1
Option #2
Pillows are a great easy and inexpensive way to spruce up a room in your home especially using the fabrics from the Cultivate Collection because it brings fun fresh colors to a room in your home that might need a little brightening up! Be sure to show us what you make with Cultivate fabrics, we love to see all the creative ways you use AGF Fabrics!
Keep Sewing,
Melissa





Leave a comment