Hi! Lauv here.
I hope you enjoyed my last quilt block post. Today I’m here with a simple and useful tutorial.
Summer is here and kids are home from school. I’ve noticed that the house tends to get a bit messier during this time. I don’t have any children, but I do have four younger sisters and I know how having them home most of the day can shake most parents' regular schedule. Shoes everywhere, your pet running all around after the children, more dirty dishes, arts and crafts supplies out of their usual place. Just an overall misplacement of things.
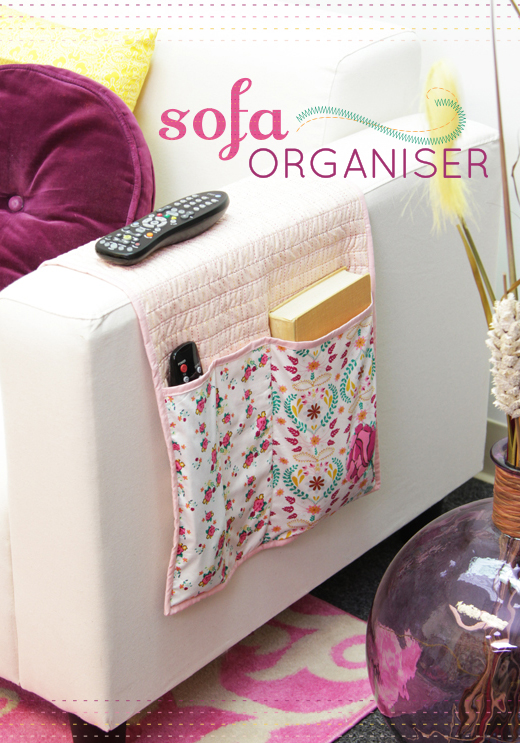
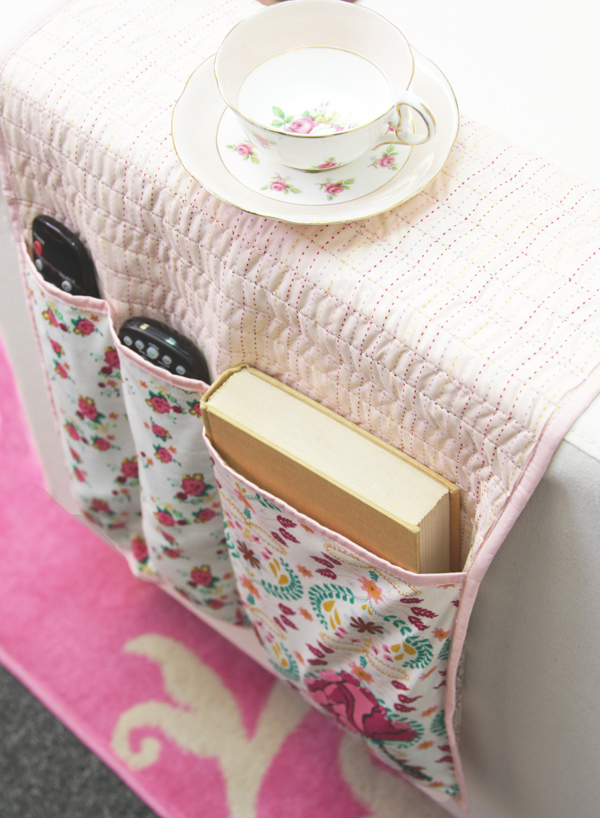
This is why I chose to make a little sofa organiser with one of our latest collections Bijoux by Bari J. The project is super simple and it'll help keep your home tidy! Creating it will help entertain the kids while they make it. It can be a group effort; dividing tasks, “you cut, you sew.” And the final reuslt is a piece to help you unclutter the summer madness.
I made it in a size that can accommodate two remote controls, and your current book indulgence. Fiona, one of our pets at home, is addicted to chewing on the remote controls. We’ve had to call the cable company twice to get new ones! With this sofa organiser, the remote controls are reachable when needed (by a human!). The living room looks more organised, and most importantly they will stay out of Fiona’s sight!
Here is what you need:
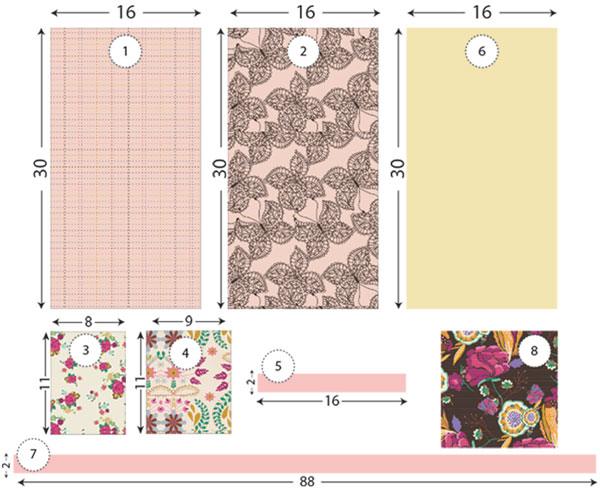
- (1) 30” x 16” rectangle of Sublime Stitchery
Spring (Bijoux Collection) - (1) 30” x 16” rectangle of Mystic Traveler
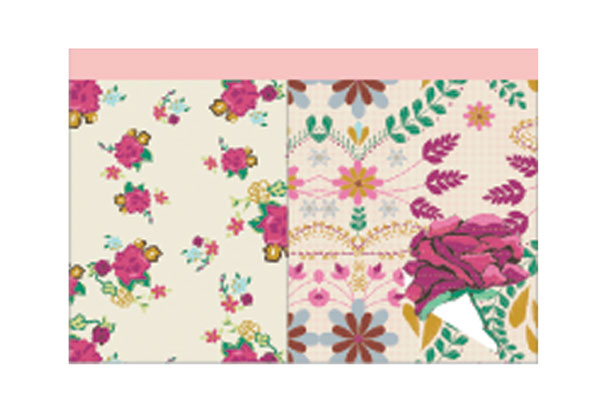
Blush (Bijoux Collection) - (1) 11” x 8” rectangle of Bohemian Charms Cream
(Bijoux Collection) - (1) 11” x 9” rectangle of Embroidery’s Fortune
Rose (Bijoux Collection) - (1) 2” x 16” rectangle of Crystal Pink (Pure
Elements Collection) - (1) 30” x 16” rectangle of batting
- (1) 2" x 88” (cut enough WOF strips to obtain a longer strip) strip
of Crystal Pink (Pure Elements Collection) - (1) Big rose from the Divine Gypsy Rosewood
Fabric for applique (Bijoux Collection)
Remember to sew all right sides together with a 1/4" of seam
allowance.
Sew piece 3 to piece 4 on the height side, always put right
sides together. In this instance you can clean the edge with a serger, or do a french seam finish. Press seams as you sew.
Sew piece 5 on the width side of the previous piece, and attach it to create a binding on the top edge. Use Steam-a-Seam
to attach piece 8 on top of piece 4 on the lower right corner. Do a top stitch (or satin stitch if preferred) on top of piece 8 to secure it.
Set piece aside.
 Align and attach pieces 1, 6 and 2
overlapping them as shown in the diagram below (Fabric 2 should be
attached facing the printed side out) quilt them together with a
zigzag stich (or as desired) going down every ¾”.

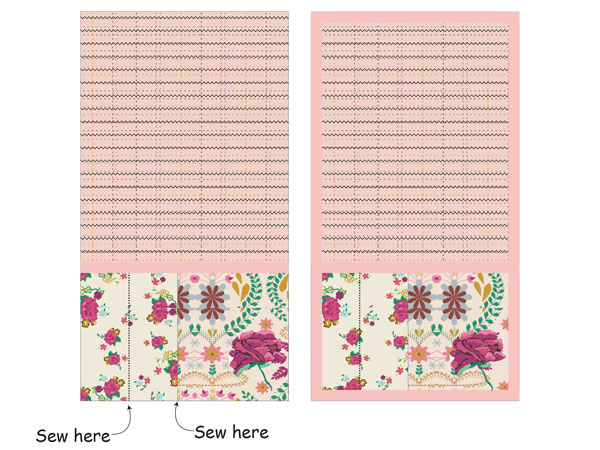
Now that you have two different pieces ready,
you can attach them together. Place pieces 3-4
in front of fabric 1. Non-printed
side of 3-4 should be facing printed
side on 1. Stitch a vertical line 7”
apart from the edge of fabric 4 to create one of the pockets (right to left).
To create the other pocket stitch a vertical line on fabric 3 3½" away from the first stitched line (from right to left).
Now that everything is sewn together, the next
and final step is to add the binding. For a tutorial on how to attach binding, click here. At the end of all of our Free Quilt Patterns there is a tutorial for binding attachment. Here we used a 2" wide strip intead of a 1 1/2" strip.
You are done! I hope this is useful. Even if you don't have a huge mess it can be a great accent for the living room. Please share your creations on our social media platforms as we'd love to see them!
Rock 'n sew!
Lauv


Leave a comment